Introduction
We’re extremely happy to announce our new Divi Popup Module for Divi Modules Pro. It’s an easy way to create Popups, Modals and Overlays directly on your page within the Visual Builder. You can create simple modal style popups with the built in text boxes, or create more complex popup designs by selecting a Divi Library layout for your popup content. In this tutorial, we’re going to show you how to create both types!
Step 1: Add a new module
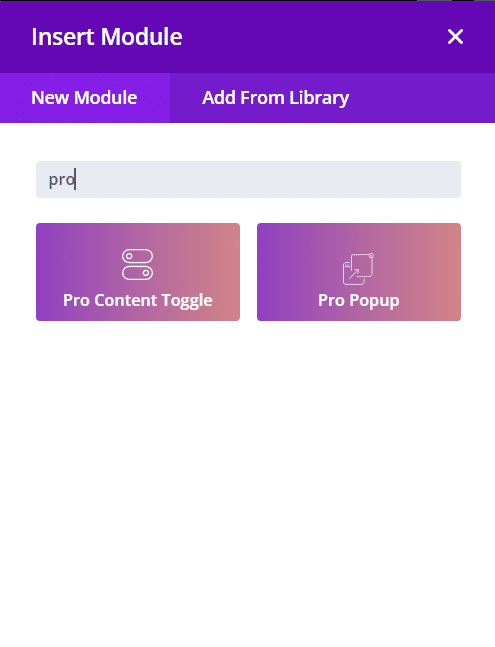
1. Enable Divi Builder and add a new Module > Search for “Popup”.
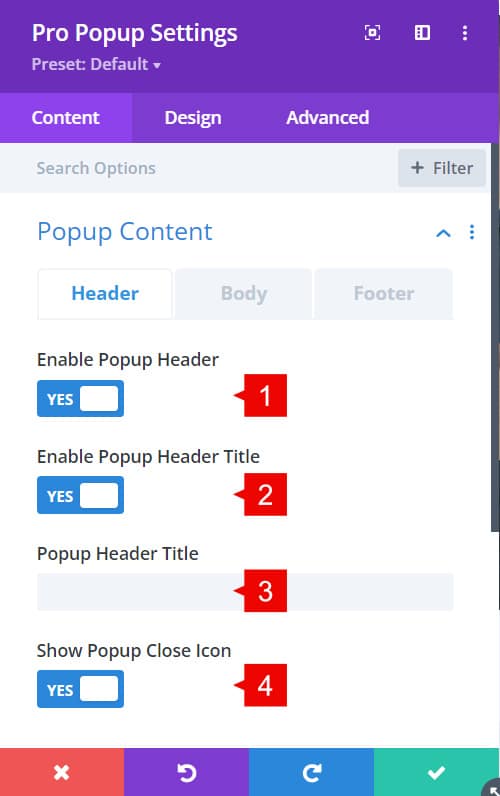
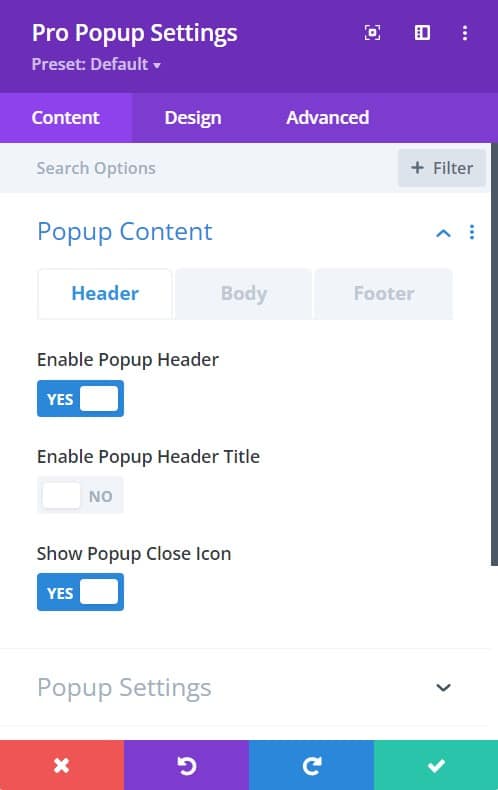
Divi Popup Module – Content tab
Popup Header
1. Enable Popup Header: By default this is enabled. Here you can add the custom title to the Popup and the close button.
2. Enable Popup Header Title: Here you can enable the Popup title and add the custom title on the field.
3. Field for the custom Popup Header Title: Here you can add the title.
4. Show Popup Close icon: Enable/disable the close icon (x)
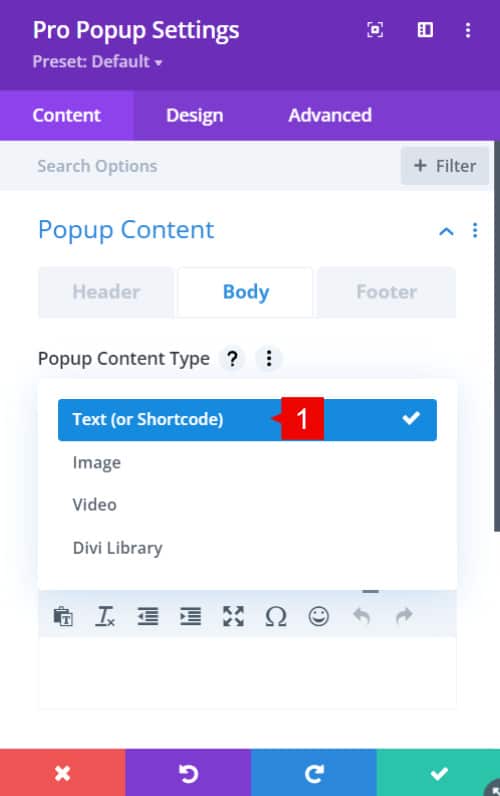
Popup Body
1. Popup Content Type: Here you can add any content you want for the Popup. Select between:
- Text (or Shortcode): paste any shortcode or plain text. (modal style popup)
- Image: upload any image you want to open.
- Video: upload or add the URL of the video.
- Divi Library: select the item from the Divi Library to display within the Popup for more complex popup designs.
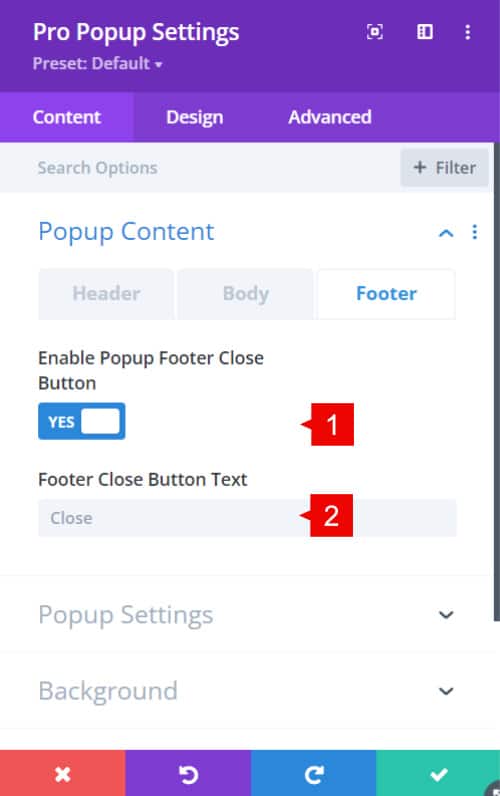
Popup Footer
1. Enable Popup Footer: This enable/disable the popup footer
2. Footer Close Button Text: Add a custom close button via a custom button.
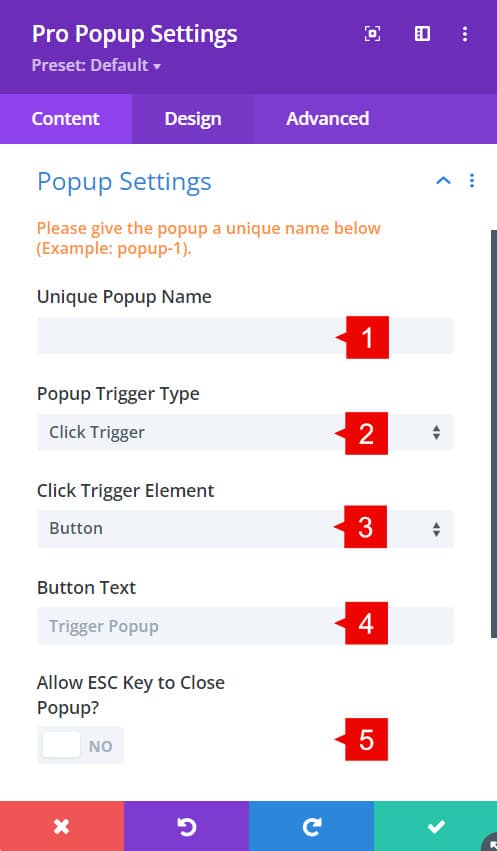
Popup Settings
1. Unique Popup Name: This is necessary for the browser cookie when you only want the popup to show once.
2. Popup Trigger type: Select between Click trigger, Timed delay and Exit Intent
– Click trigger: this will allow you to trigger the Popup from a button, image, icon or text
– Timed delay: This will allow you to set a time to automatically trigger the Popup.
– Exit Intent: This will trigger the Popup when the cursor is leaving the page.
3. Allow ESC key to close popup: Enable/disable to allow ESC key to close the popup
Background
1. Click trigger background: Background of the trigger button.
2. Popup Background Overlay: Background of the Popup opened.
3. Popup Background: Global background of the Popup.
4. Popup Header Background: Background of the Popup header area.
5. Popup Body Background: Background of the Popup body area.
6. Popup Footer Background: Background of the Footer body area.
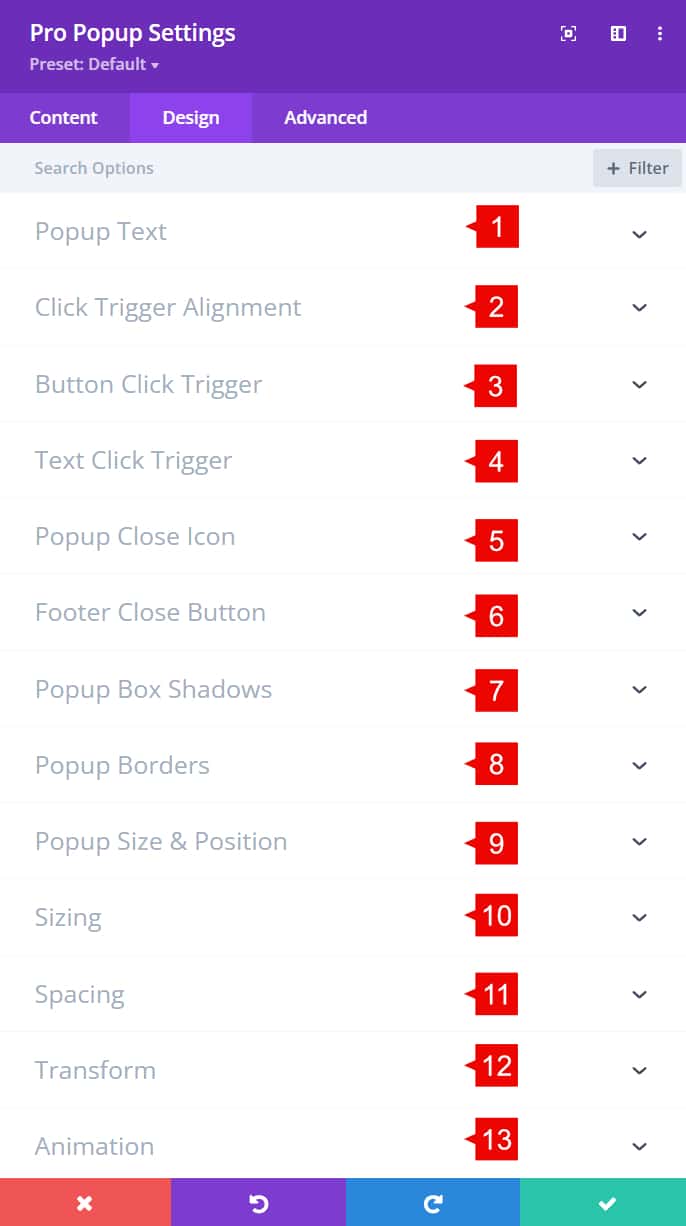
Pro PopUps – Design Tab
1. Popup Text: style the content of the header and body
2. Click trigger alignment: position of the button (left, center, right).
3. Button Click Trigger: Style the button trigger.
4. Text Click Trigger: Style the text of the text trigger.
5. Popup Close Icon: Style the close icon (size and color)
6. Footer Close Button: Style the footer close button.
7. Popup Box Shadow: add box shadow to each part of the popup.
8. Popup Borders: Style the border of the Popup.
9. Popup size and position: Change the size and position of the Popup (center, top right, top left, bottom right, bottom left, etc.)
10. Sizing: control de size (with, max-width, height, max-height, etc.) of the popup module.
11. Spacing: control de margin and padding of the popup module.
12. Transform: transform control of the popup module.
13. Animation: entrance animation of the popup module.
Step 2: Use Case Tutorial
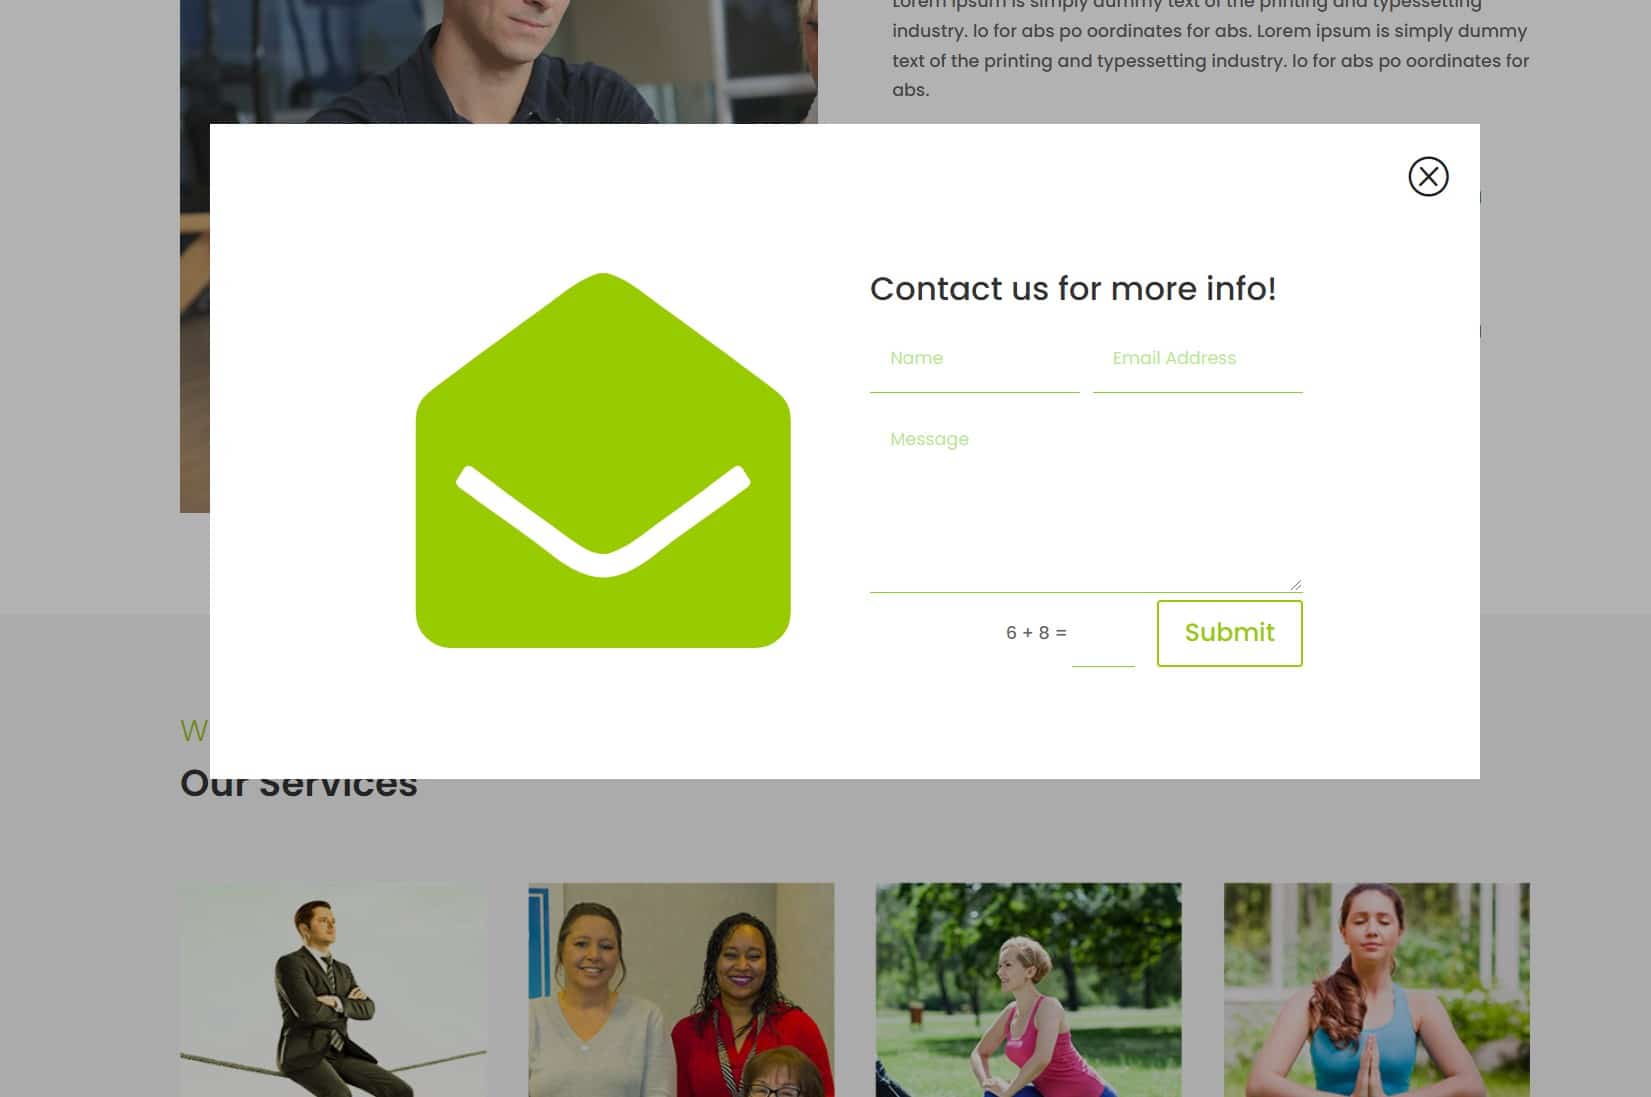
Now that we have the basics covered, let’s show you how to create something awesome!
Let’s create a contact form popup that will be triggered on a Click Trigger.
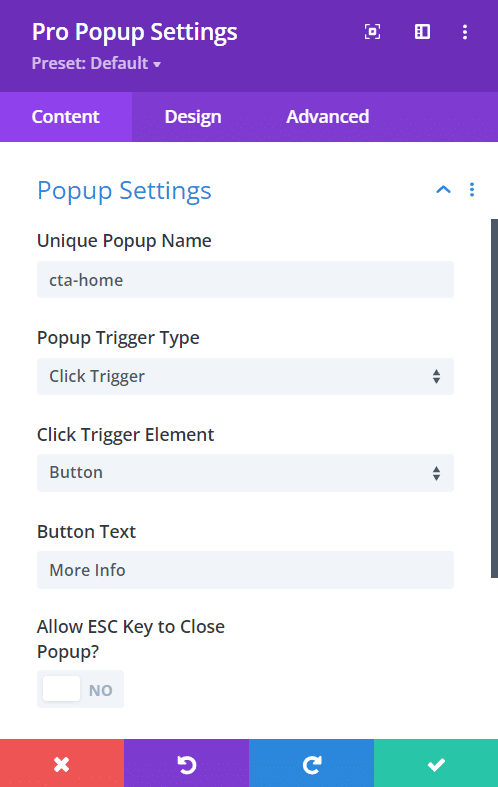
1. Let’s set a Click Trigger
- Click trigger element: Button
- Button Text: Contact Us
- Enable the Allow ESC key to close PopUp
2. Let’s Add the Popup Header (Close Icon).
- Let’s keep enabled the Popup Header
- Disable the Popup Title
- Keep enabled the “Show Popup Close Icon” since we’ll need it to close the Popup
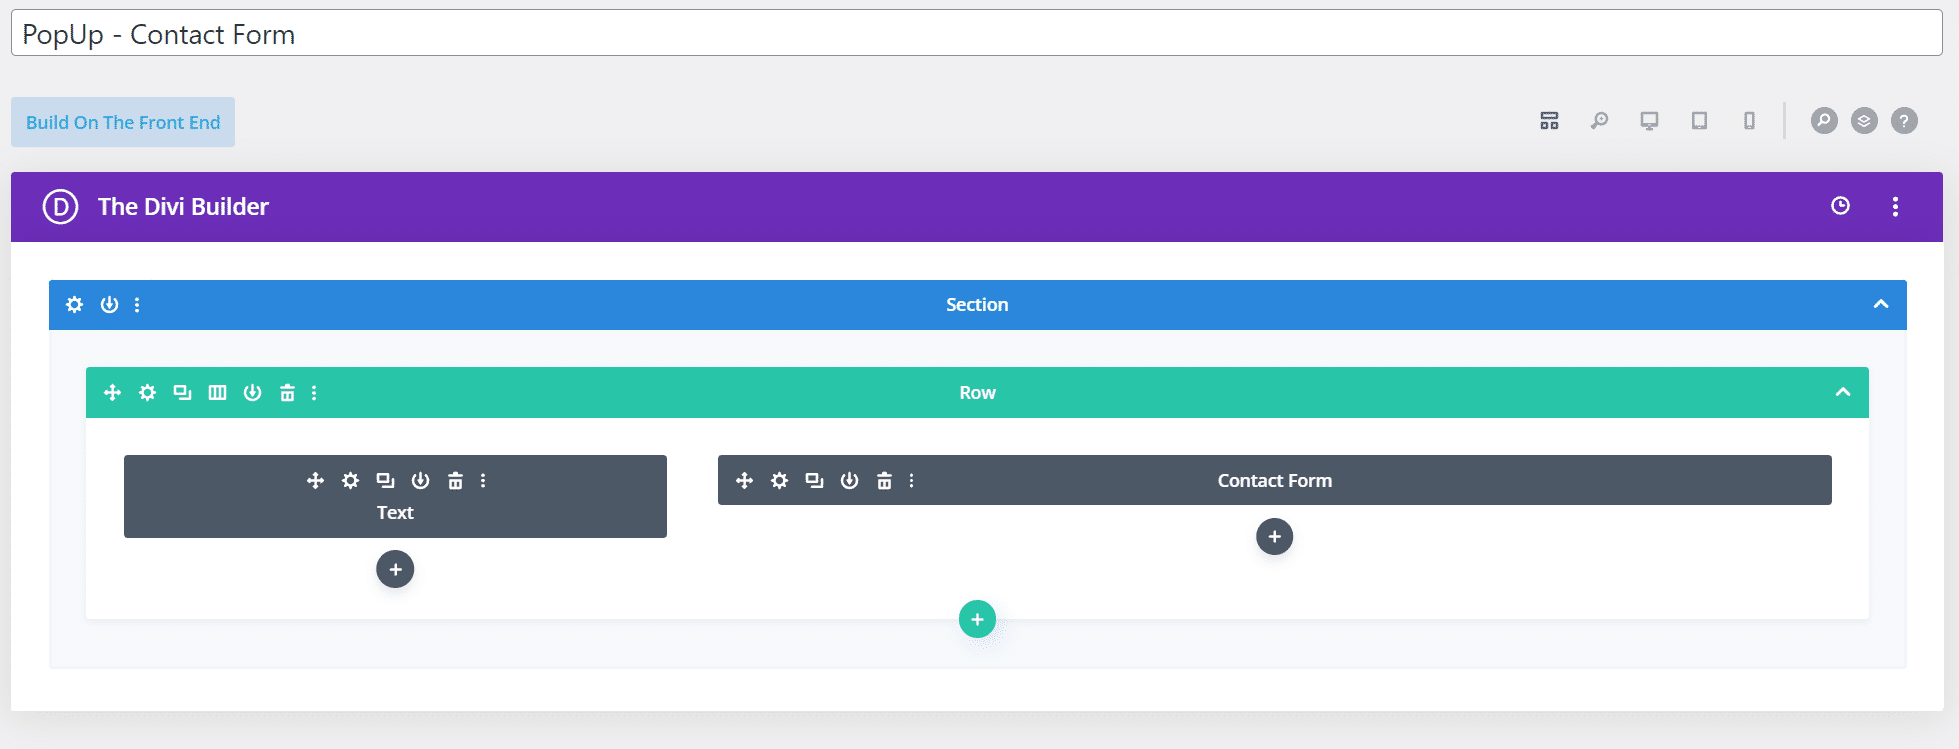
3. For our content, we’ll add it from the Divi Library since we need the contact form customized.
- Go to Divi Library > Add a new section layout
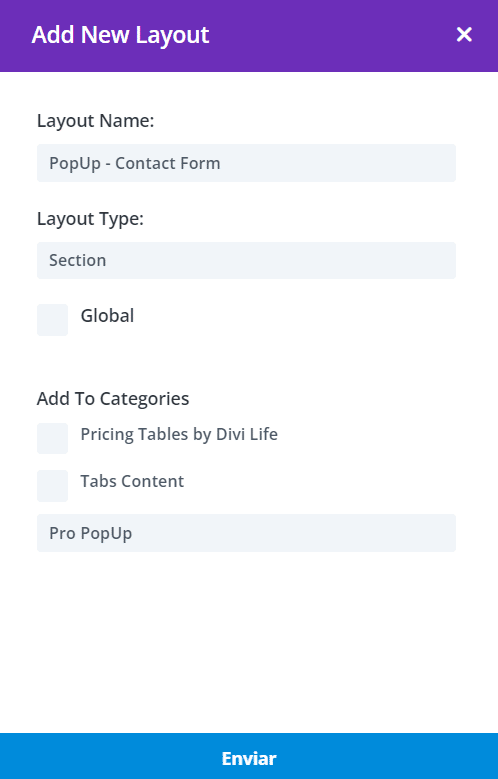
- Create the layout on the section added
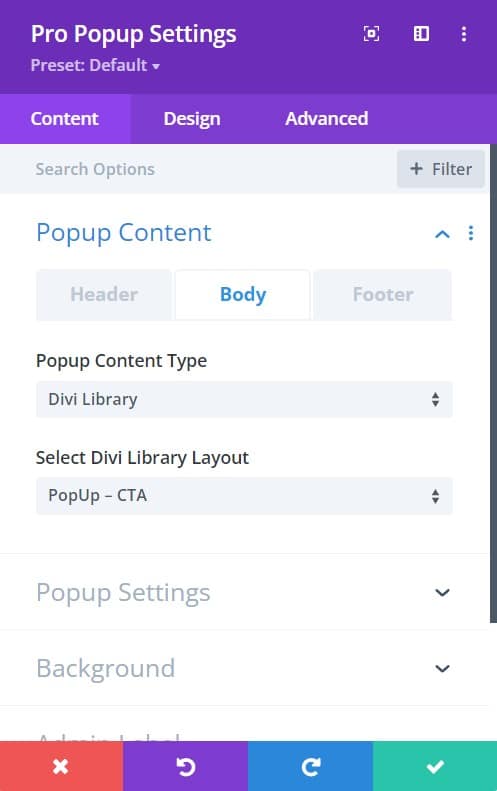
- Now this saved layout can be added to the Popup. Go to the Pro Popup module > Popup Body > On Popup Content Type select Divi Library > Select the layout created.
3. Background settings.
- Click trigger background: transparent.
- Popup background overlay: rgba(0,0,0,0.3)
- Popup background: #ffffff
- Popup header background: transparent
- Popup body background: transparent
Save changes.
And this is the final result: