
Introduction
Divi has a built in button module that is great but limited. It doesn’t allow you to add buttons side by side! You could of course use columns but this has a lot of limitations too, and doesn’t scale well for responsive design. The Divi Multi Button module saves the day and makes it super easy to add multiple buttons side by side!
In this tutorial we’re going to give you an overview of the Multi Button module, then we’ll move on to show you a Use Case example.
Step 1: Add a new module
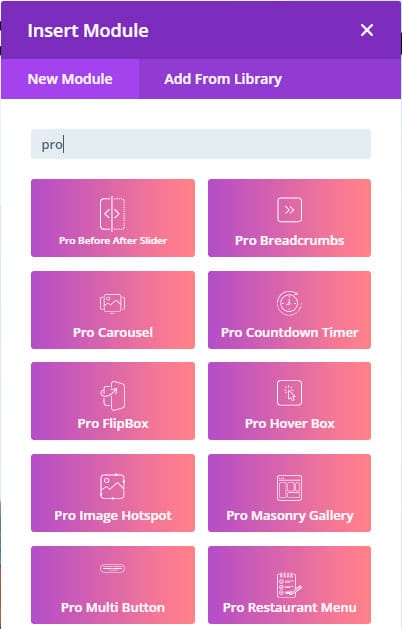
1. Enable Divi Builder and add a new Module > Search for “Pro Multi Button”.
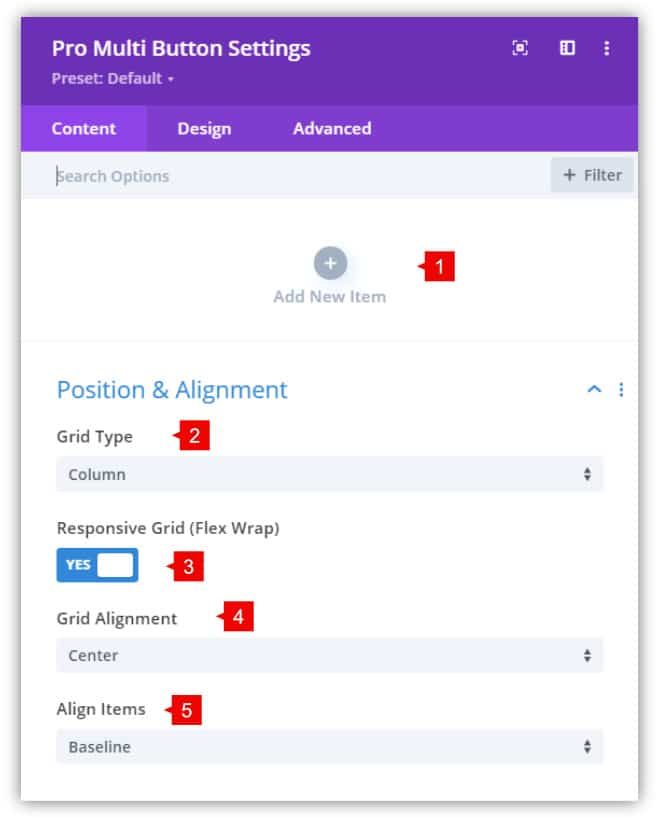
Pro Multi Button Module – Content tab
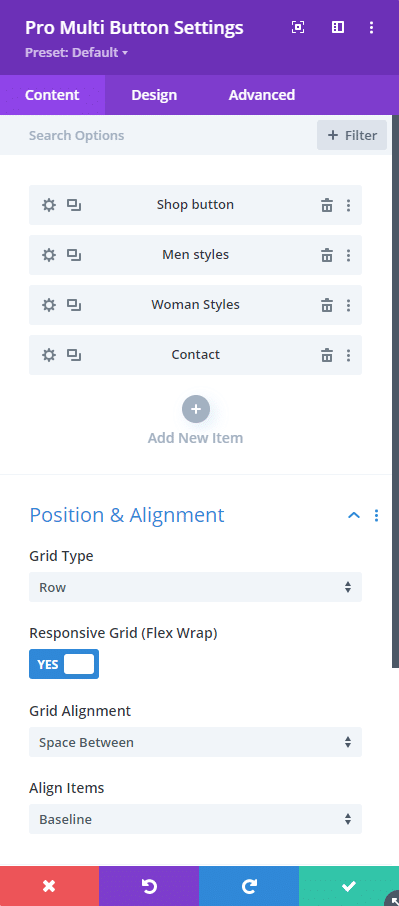
1. To add Multi Buttons just click on the “+” icon.
2. Grid Type: Here you can change how to align the buttons. By default is set on “Column” (Vertical) but it can be changed by “Row” (Horizontal).
3. Responsive Grid: By enabling this feature, the buttons will be shown in different lines on responsive.
4. Grid Alignment: Here you can align the horizontal position of the buttons. By default is Center.
5. Align Elements: Here you can align the vertical position of the buttons. By default is Baseline.
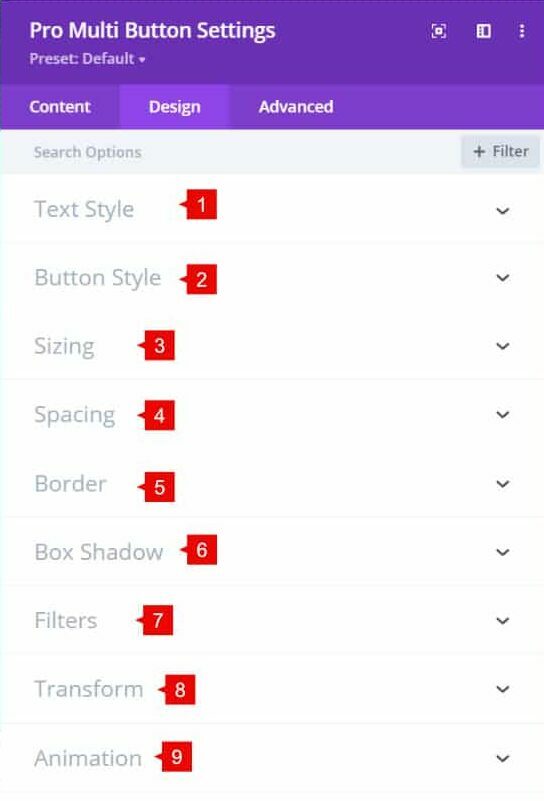
Pro Multi Button Module – Design tab
1. Text Style: Style the text
2. Button Style: Style the buttons.
3. Sizing:change the width and height of the module.
4. Spacing: change the margin and padding values.
5. Border: Add borders to the module
6. Box Shadow: Add a shadow to the module (not each button). To add a shadow to each button, you need to go to the button settings > design tab > box shadow
7. Filters: Add filters to the module.
8. Transform: Use the transform options.
9. Animation: Add animation to the module.
Step 2: Use Case Tutorial
Now that we’ve covered the basics, let’s show you how to create something useful with the Multi Button module.
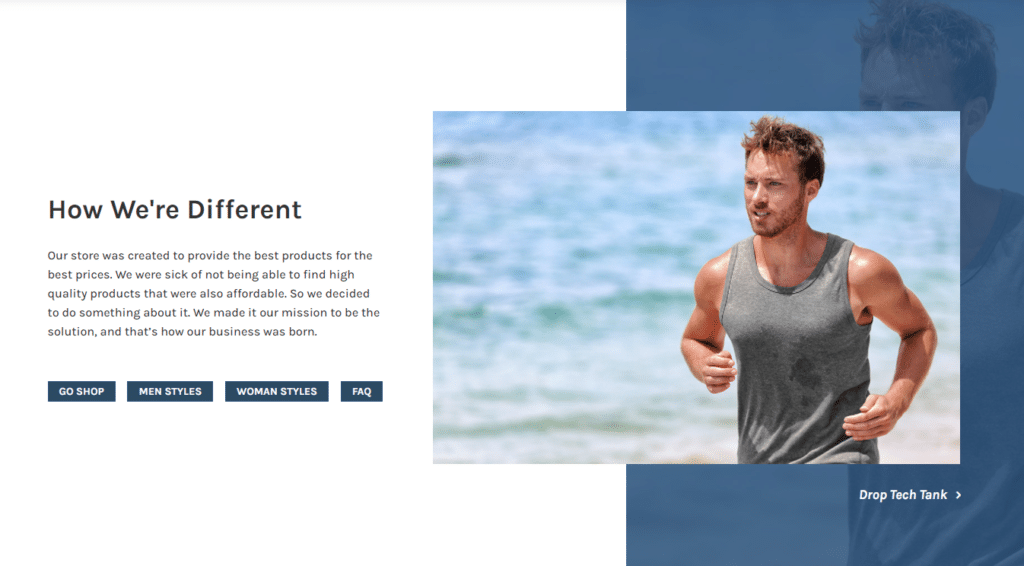
Here’s what we’ll be creating:
We’ll be using our Divi WooCommerce child theme for this example.
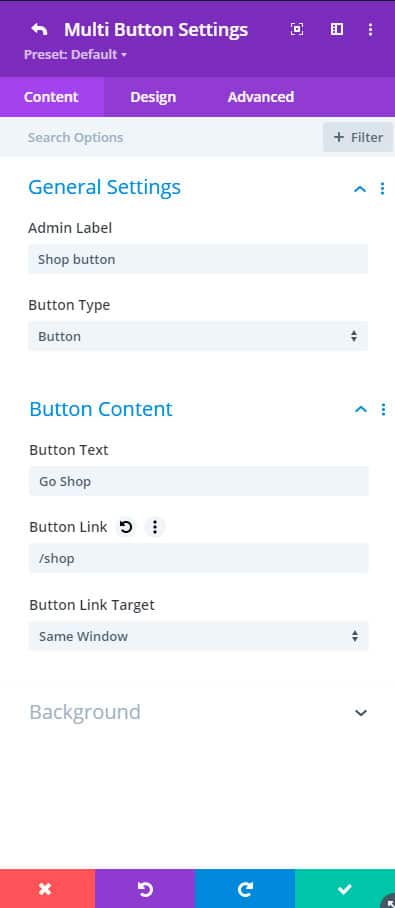
1. Add a new Pro Multi Button module
- Add some buttons to the module. When you add a new module, a new tab is opened where you can set up the button.
- Add an admin label (optional)
- Select button type: Button
- Add the button text
- Add the button URL
- Now set up the position of the buttons. In this case:
- Grid Type: Row
- Enable the Responsive Grid
- Grid Alignment: Space Between
- Align elements: Baseline
2. Style the buttons
- Color: #FFFFFF
- Background color: #2b4a64
Save changes, and we’re done! This is the final result: