
Introduction
The Divi Image Hotspot module is a great way to highlight or draw attention to specific parts of an image. It allows you to drop “pins” in the image with additional information that is displayed on hover. In this tutorial, we’re going to give you an overview of the settings and options, then we’ll move on to a Use Case Tutorial to show you how to create something specific.
Step 1: Add a new module
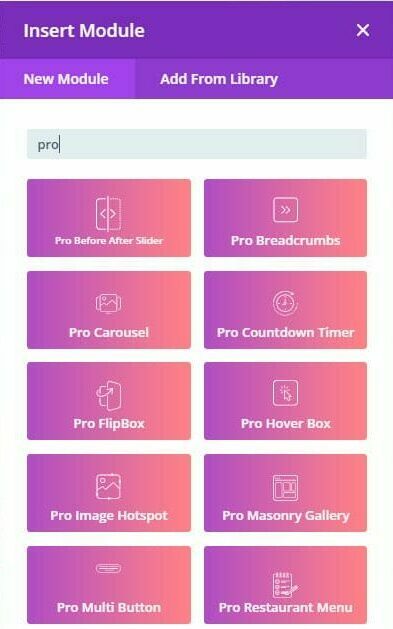
1. Enable Divi Builder and add a new Module > Search for “Pro Image Spot”.
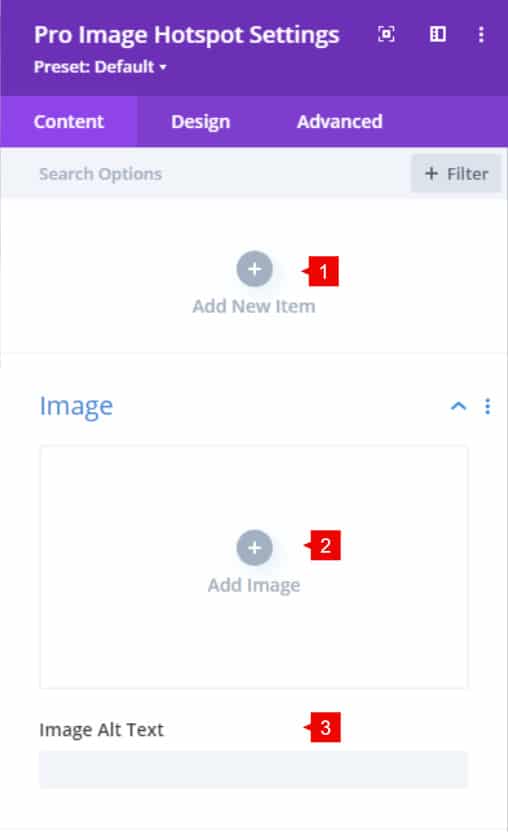
Pro Image Spot Module – Content tab
1. Click on the “+” icon to add each hotspot.
2. Image: This will be the image that you’ll use to add the hotspots.
3. Image Alt Text: Add alternative text to the image for SEO purposes.
Hotspot items
When adding a new item to the hotspots, a new content tab will appear where you can add the content you want and adjust the position of the hotspot in the image.
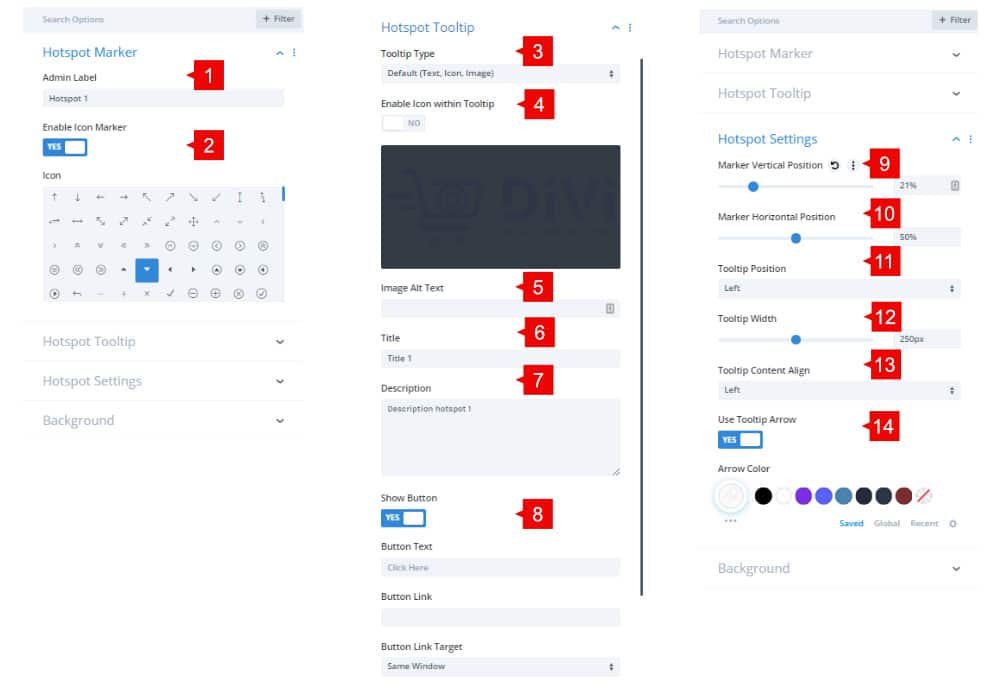
Hotspot Marker
1. Admin label: Add a label to identify the hotspot item.
2. Enable Icon Marker: Add an icon that will be on your image and will be the point where a hotspot will be shown.
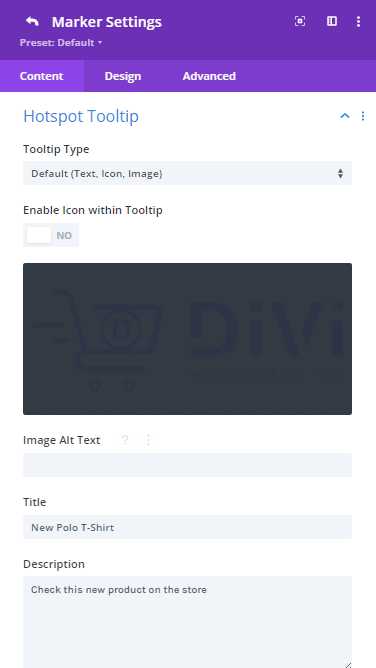
Hotspot Tooltip
3. Tooltip type: Selec the content type to be shown in the tooltip. You can select between the default editor or choose a layout from the Divi Library.
4. Enable Icon within Tooltip: Using the default editor, is like using a blurb module, so you can select an icon or use an image.
5. Image Alt Text: Add an alternative text for SEO purposes.
6. Title: The title of the content within the tooltip.
7. Description: The description of the content within the tooltip.
8. Show Button: Add a button within the tooltip.
Hotspot Settings
9. Market Vertical Position: Move the slider to position the marker in a vertical space.
10. Market Horizontal Position: Move the slider to position the marker in a horizontal space.
11. Tooltip position: Set the position of the tooltip container; by default is set to the left, but it can be changed to right, top or bottom.
12. Tooltip width: Set the width of the tooltip container.
13. Tooltip content align: Set the position of the tooltip content; by default is set to the left, but it can be changed to center or right.
14. User tooltip arrow: Add an arrow to the tooltip. Once enabled, you can change the color of it.
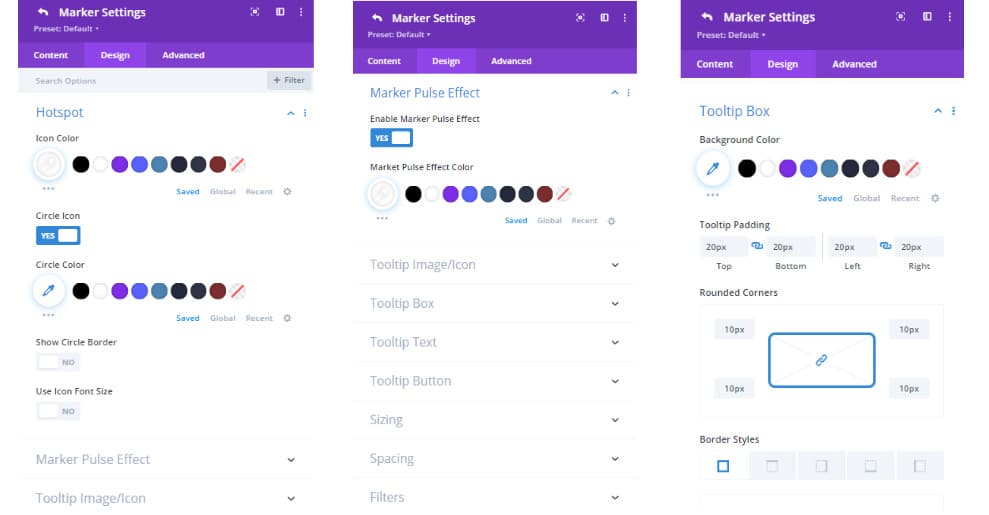
Hotspot item – Design tab
Hotspot
1. Icon color: add a custom color to the icon marker (Point 2 – Hotspot marker)
2. Image: This will be the image that you’ll use to add the hotspots.
3. Image Alt Text: Add alternative text to the image for SEO purposes.
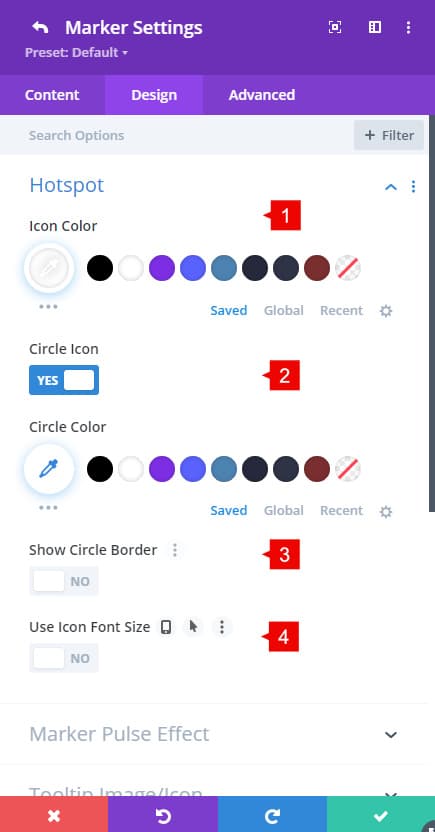
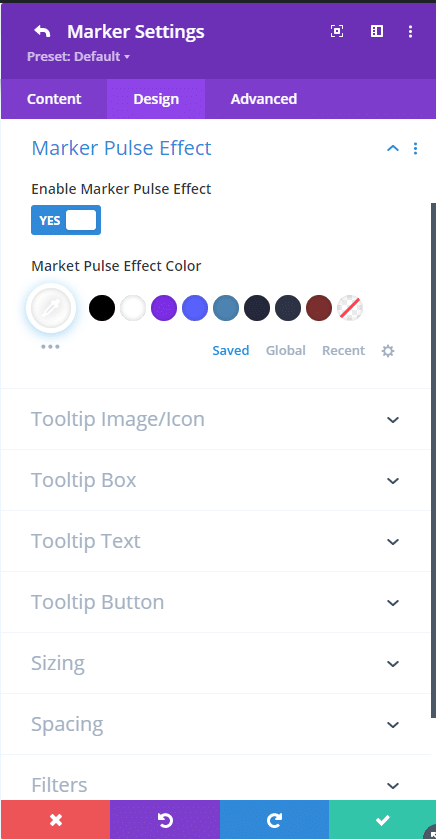
Marker Pulse Effect
1. By enabling this feature, a pulse effect will be enabled. Once enabled, you can change the color of the pulse effect.
Tooltip Image/Icon
1. Change the width of the image/icon, add borders, rounded borders, shadow.
![]()
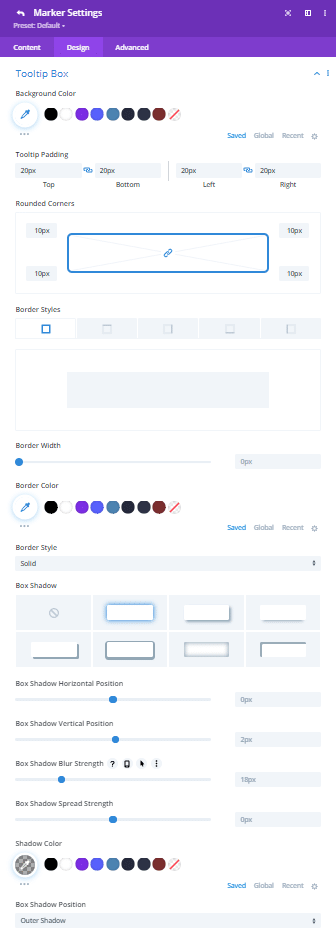
Tooltip Box
1. Style the box of the tooltip, as inner padding, borders, rounded borders, and shadows.
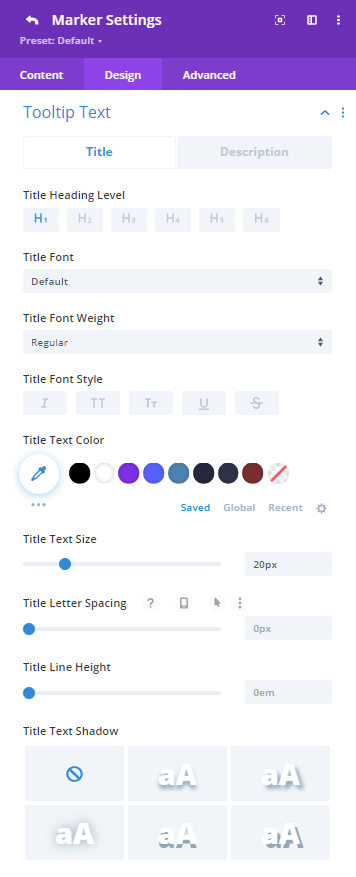
Tooltip Text
1. Style the titles and texts within the tooltip.
Step 2: Use Case Tutorial
Since the basics have been covered above, let’s move on to something a bit more exciting. We’re going to show you step-by-step how to create the following example:
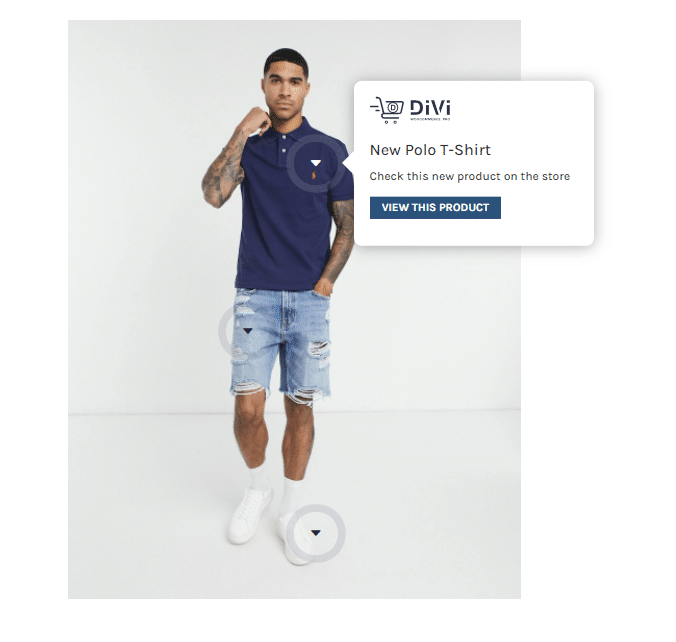
Let’s get to work!
1. Add a new Image HotSpot module to your site and add the first item
- Add a label for admin purposes.
- Enable the icon marker and select an icon
![]()
2. Add the content of the tooltip, as the title, description, image or icon, and a button.
3. Adjust the settings for the tooltip
- Adjust the vertical and horizontal positions to set the marker where you want the tooltip.
- Set the tooltip position to the right
- Enable the arrow and style it.

3. Style the hotspot
- Add color to the icon: #FFFFFF
- Enable the “Circle Icon”
- Enable the Marker pulse effect and add a color: #FFFFFF
- Style the box with a border radius 10px, inner padding 20px and box shadow.
3. Style the text and button
- Font size for title: 20px
- Font size for description: 15px
Save changes. You can duplicate the hotspot and just change the content and position of the tooltip.